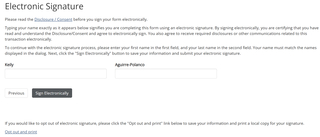
Add e-Signature(s) within the form - You have 2 options for placing a signature line for participants to electronically sign. either use the (A) default signature line which will always appear on the last page of the form or (B) signature widget can be placed anywhere within the form.
- (A) Default Signature - No action is needed to add the signature line(s). The participant must complete their form, then click Next to get to the default Electronic Signature page which is always the last page of the form. When e-signed by the participant , the signature line will show text stating Participant has electronically signed with a Date and Time. Below is an example of how the last page with the Electronic Signature displays.
- Completed Default Signature - After participant has signed their name, below is an example of how the electronic signature appears with text stating the participant has electronically signed with a timestamp.
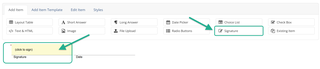
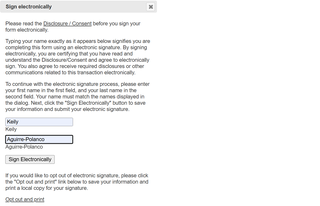
- (B) Signature Widget - Drag and drop the Signature Widget form item to place the signature line anywhere you prefer within the form. Participant must then click in the yellow area (click to sign) and a pop-up window will display the Sign electronically window. Once participant signs, it will display their name in cursive with an auto populated date and time.
- NOTE: Participants must sign their name exactly has its spelled within the Sign electronically pop-up window. If an participant tries to type their name with any other spelling other than what is displayed, it will display an error. (ie. If participant cant tries to type their nick name and it doesn’t match the name displayed, it will display an error).
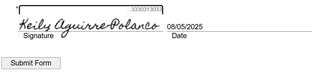
- Completed Signature Widget - After participant has signed their name, below is an example of how the electronic signature appears in cursive with an automatically populated timestamp.
- NOTE: When using the Signature Widget in the Design View, if you click Preview in Browser or Preview as PDF, you will always see the Default Signature lines at the bottom of the last page as well as the signature line(s) for the Signature Widget. The Default Signature line(s) will NOT be displayed once the form is moved to Production and completed by participants.
Hiding Unused Signature Lines
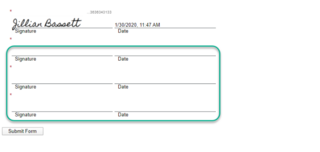
Forms with Multiple Participants and using conditional workflow, you can hide any unused signature lines by selecting Yes for Hide unused signature lines.
- Action > Edit Form Template > Participants > Hide unused signature lines = Yes

NOTE: If you do not hide unused signature lines in a form with multiple participants, the unused empty signature lines will appear on the final form once submitted, as seen in the example below. We suggest you hide unused signature lines so only participants that need to sign the form will have signature lines displayed.
NOTE: If you are using the Signature Widget, you will see the default signature line while designing the form but it will not appear during testing or in production.
Disclosure / Consent
There is a Disclosure/Consent hyperlink that Form Participants are asked to read prior to electronically signing the form.
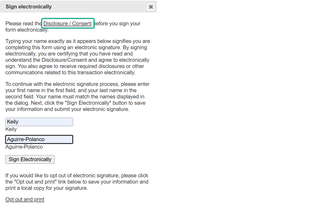
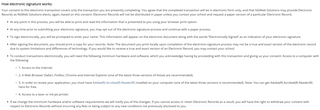
After clicking on the Disclosure/Consent hyperlink the following is displayed to the Form Participant.
Questions? Contact Dynamic Forms ITS Team by emailing DynamicForms.ITS@yale.edu